
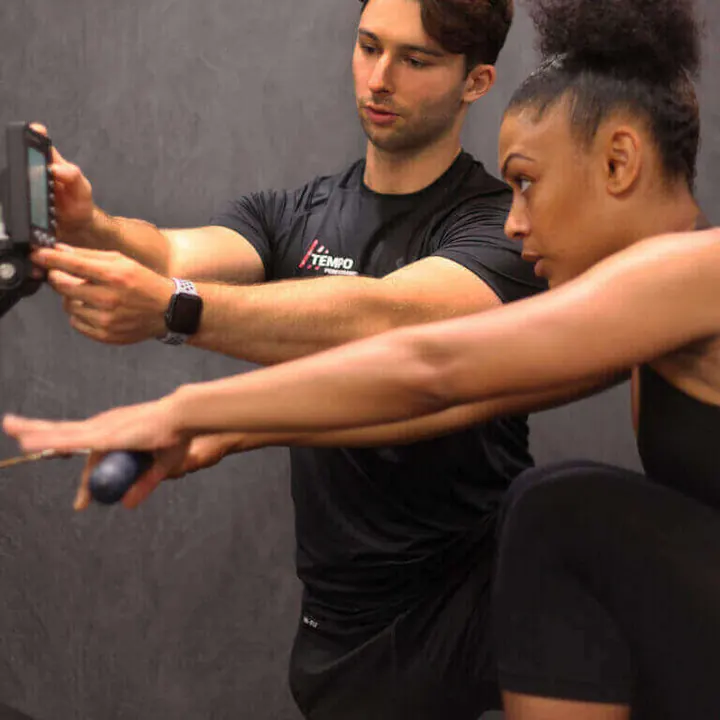
What does a HYROX programme need to cover?
HYROX Singles starts with a 1 km run. Each run is followed by the next station below, giving eight runs and eight stations in total:
| Station | Race distance or repetitions |
|---|---|
| SkiErg | 1,000 m |
| Sled push | 50 m |
| Sled pull | 50 m |
| Burpee broad jumps | 80 m |
| Rowing | 1,000 m |
| Kettlebell farmers carry | 200 m |
| Sandbag lunges | 100 m |
| Wall balls | 100 repetitions |
Select loads and targets for your division. Check the current event instructions and official HYROX Singles rulebook before racing. The format above was checked against the 2026/27 edition.
Preparation needs three connected parts: running fitness, enough strength for the loads, and the skill to repeat each movement when tired. The balance depends on your starting point. A strong lifter who struggles with repeated runs needs a different plan from a runner who cannot move the sled smoothly.
How to use the examples below: these are coaching examples for adults who already tolerate the movements. They are options to select from across a programme, not one workout or a complete weekly prescription. Warm up first. Start with manageable loads, distances and repetitions. Reduce the work when technique deteriorates; stop an exercise if it causes pain.
Each station below includes a technique sequence, a common correction and a training example. Learn the movement at an easy effort before adding speed or fatigue. Coaching cues describe how to practise; the linked race rules define the competition standard. These are selected rule reminders, not a complete judging guide.
Improve the kilometre you can repeat
Improving running pace can make a meaningful difference because the run appears eight times.
Ten seconds faster per kilometre across all eight runs saves 80 seconds. Fifteen seconds saves two minutes. That calculation assumes station and transition times stay the same. Going faster early can erase the saving if it forces you to slow down later.
The target is a pace you can maintain between stations. Your fastest fresh kilometre is useful information, but it is not automatically your race pace.
A programme can develop this through:
- Easy running: a pace that allows full sentences. For someone already running regularly, an example is 25–45 minutes at a comfortable effort.
- Controlled intervals: after a warm-up, try 4 × 1 km at a hard but repeatable effort, with two minutes of easy walking or jogging between repetitions. Finish with some capacity left. Shorter repetitions suit runners who are still building tolerance.
- Running after a station: once the separate movements are reliable, practise a short station effort followed by a controlled run. Compare the first and final repetitions.
Progress one element at a time. Hold the same pace and recovery before adding a fifth kilometre repetition. If the final repetitions slow sharply, first review the opening pace and accumulated fatigue.
A small study of 11 recreational athletes in a simulated HYROX race found that running took more time than the stations, and higher aerobic capacity was associated with faster total times. This supports giving running a clear place in preparation; it does not establish one ideal programme. Brandt and colleagues, 2025.
A larger analysis of 39,696 PRO and ELITE race results found that running accounted for about half of total time among the top 100 performances per season. Stations still made a meaningful difference. Race-result data help show where time is spent; they cannot tell us which training programme caused improvement. Rappelt and colleagues, 2026.
1 SkiErg: develop a rhythm you can afford
You reach the SkiErg early in the race, after the opening kilometre. Choose a pace that leaves you ready to run again.
SkiErg technique, step by step
- Set your position. Stand about shoulder-width apart, with knees slightly bent. Hold the handles above eye level, elbows bent and wrists straight.
- Start with the body. Tighten your trunk and begin the pull with your chest and shoulders moving down. Let the arms follow.
- Hinge at the hips. Send your hips back as your torso tips forward. Allow some knee bend without turning each pull into a deep squat.
- Finish beside your thighs. Drive the handles down towards your pockets, leaving a little bend in the elbows. Keep the movement controlled.
- Return smoothly. Rise and lift your hands into the next starting position. Breathe during the return; avoid rushing it.
Coach’s cue: soft knees, hinge, hands to pockets. If your arms tire first, slow down and reconnect the body drive. Concept2’s SkiErg technique guidance.
Race check: your feet may lift but must return to the platform, not the floor. Wait for judge confirmation before leaving. Singles §8.1.
Example: 4 × 250 m at a steady, repeatable pace, resting 60–90 seconds between efforts. Note the time, strokes per minute and effort for each repetition.
Progression: move to 2 × 500 m at a similar controlled effort when the shorter efforts are consistent. Later, practise the full distance without chasing a personal best every time.
Cable pulldowns and controlled trunk exercises can support the strength work. Keep enough practice on the SkiErg to learn the timing.
Measure: consistent pace and smooth technique, followed by a controlled return to running. A faster machine split is only useful if its cost is manageable.
2 Sled push: practise force, footwork and repeat efforts
The sled tests your ability to apply force repeatedly while staying in a useful position. Practise a firm trunk, stable arm position and short, purposeful steps. Find a body angle that lets you keep the sled moving without losing your footing.
Sled push technique, step by step
- Prepare the lane. Check that the load is secure and the route is clear. Start with a weight that lets you practise continuous movement.
- Choose your arm position. Grip both uprights. A bent-arm setup brings the poles close to your forearms; a longer-arm setup gives more distance from the sled. Use the position that lets you brace and breathe. Keep control through your hands and avoid pressing a pole into the elbow joint.
- Build a firm body position. Lean into the sled, tighten your trunk and keep your head in line with your back. Your arms should transmit force without repeatedly bending and straightening.
- Apply pressure before stepping. Take up the pressure against the sled, then push the floor away. Start with short steps under your body. Avoid reaching far forward with each foot.
- Keep the sled moving. Maintain a steady sequence of steps and short, regular breaths. If your feet slip or the sled stalls, reset your position; reduce the load in training if you cannot restore control.
- Finish and reset. Stop under control at the end of the length. Release pressure before changing ends, then establish your grip and stance again.
Coach’s cue: firm arms, strong trunk, short steps. If your hips rise while the sled stays still, reset the angle and load instead of folding further at the waist.
Race check: the whole sled must cross each line. Singles §8.2.
Squats and split squats can build supporting leg strength. The sled still needs direct practice: it has a different feel, surface and demand from a squat.
Example: 4 × 10–12.5 m with a load you can move continuously, resting 60–90 seconds between lengths. Start lighter if you stall or lose position.
Progression: repeat the same distance, surface and load with more consistent times. Then increase either the load or the amount of work. Do not increase both simply because one session felt good.
Record the sled, total load, surface and footwear. The same plate weight can feel very different on another surface, so a gym sled time is not a reliable race prediction.
Measure: time per length, stops and how well you recover for the next run.
3 Sled pull: train the rope skill as well as strength
The pull adds grip, pulling strength and rope handling. Practise a stable stance, controlled pulls and a clear place for the loose rope. Rehearse within a marked working area so footwork stays deliberate.
Sled pull technique, step by step
- Organise the rope. Face the sled with the rope in front of you and a clear place for the slack. Never wrap it around a hand, wrist or body part.
- Set a stable stance. Place your feet about hip-width apart, soften your knees and hinge slightly at the hips. Keep your trunk firm and your shoulders away from your ears.
- Take up the slack. Establish tension before the first hard pull. Avoid a sudden jerk against a loose rope.
- Pull and regrip. Draw one hand towards your lower ribs or hip while the other controls the rope. Establish a secure grip before reaching forward again. Use repeatable pulls rather than one large heave.
- Use your legs within the space. A small weight shift or controlled backward steps can support the pull. Practise returning towards the front of the box while gathering rope, then re-establish tension. Keep your feet clear of loops throughout.
- Manage the finish. Watch the sled as well as the rope. Stop the pull under control, place the rope clear of your feet and move around the equipment carefully before the next length.
Coach’s cue: tension first, pull, regrip. Breathe between pulls. If you are jerking, leaning back sharply or stepping into rope, shorten the pull and reduce the load.
Race check: stay standing inside the box; avoid its front and back lines while holding the rope. Keep the rope in your lane. Singles §8.3.
Rows, hip hinges and loaded holds can support the station. Rope practice shows whether that strength is usable in the movement.
Example: 4 × 10–12.5 m, with 60–90 seconds of recovery. Use a load that allows controlled pulls and safe rope handling.
Progression: first reduce unnecessary pauses and rope tangles at the same load. Then adjust distance or load according to the limiting factor.
Measure: time per length, grip breaks and lost time managing the rope.
How to use a ten-minute sled block
A regular ten-minute block can give sled practice a clear place in the week. Ten minutes is a practical time allowance, not a proven optimum.
One option, after warming up, is five rounds of:
- Up to 30 seconds of controlled pushing.
- 30 seconds of rest and safe setup.
- Up to 30 seconds of controlled pulling.
- 30 seconds of rest.
Five two-minute rounds make ten minutes. Finish a short length and rest if you reach the end before the work period ends. Use a load that allows repeatable movement and enough space for each effort. Allow extra setup time when needed; the clock should not force a rushed turn or rope change.
Use this instead of the separate push and pull examples above. Start with fewer rounds if necessary. Consistency means returning to useful practice and recording it; it does not require ten minutes of continuous maximum effort.
4 Burpee broad jumps: make the next repetition repeatable
A very long jump may reduce the number of jumps but cost more energy. Practise a jump length that allows a controlled landing and a smooth next burpee.
Burpee broad jump technique, step by step
- Set the hands close. Bend your knees and hips, then place your palms just in front of your toes at about shoulder width. Keep the fingers spread and hands planted. Use the start-line position described below for the first repetition.
- Lower with control. Step or jump your feet back and lower your chest to the floor. Bend the elbows rather than dropping heavily through the shoulders or lower back.
- Bring the feet forward. Press through your hands and step or jump into a position from which you can jump. Keep your feet behind your fingertips. Stepping can help you maintain a steady rhythm.
- Prepare the jump. Lift your hands, send your hips back and swing your arms behind you. Aim for a distance you can repeat, with enough knee bend to push off and absorb the landing.
- Take off and land together. Push through both feet, swing the arms forward and land on both feet with soft knees. Keep your feet level with each other and your knees aligned with your toes.
- Begin the next repetition where you land. Regain control, then lower your hands for the next burpee. Avoid extra steps or shuffles. Breathe out through the effort and establish a repeatable rhythm.
Coach’s cue: hands close, chest down, soft landing. If you stumble after landing, shorten the jump. Practise the burpee and broad jump separately before joining them under fatigue.
Race check: begin each section with hands behind its start line. On later repetitions, the base of your palms must be no more than 30 cm ahead of your leading toes. Do not move planted hands forward. Singles §8.4.
Example: 4 × 10 m of unweighted burpee broad jumps, resting 60–90 seconds between lengths. Record time, repetitions and whether the landing remains stable.
Progression: build from short lengths to 15–20 m efforts before attempting longer continuous work. Keep the rhythm controlled as distance increases.
For separate power practice, a suitable athlete might use 3 sets of 3 unweighted broad jumps with 90–120 seconds of rest. Perform these while fresh and stop when landing quality declines.
Should you add weight? Loaded jumps are an optional power exercise for an experienced athlete with good landing control. They are not the automatic next step. Improve unweighted jumping, lower-body strength and repeated burpee technique first. Adding weight to fatigued burpee broad jumps is not the default progression in this plan.
Measure: time over a fixed distance, controlled landings and the next run. A longer isolated jump does not by itself demonstrate better race performance.
5 Rowing: use the legs and control the return
Keep the drive coordinated and allow time for the return. A hurried stroke can feel busy without moving you efficiently.
Rowing technique, step by step
- Set up. Adjust the footplates and secure the straps across the widest part of your feet. Hold the handle with relaxed hands and straight wrists.
- Find the catch. Slide forward with arms long, shoulders relaxed and a small forward lean from the hips. Stop with shins close to vertical; avoid compressing further to gain reach.
- Drive with the legs. Push against the footplates while keeping the arms long. Move the handle with your body instead of bending your elbows immediately.
- Finish with body and arms. As the legs extend, open the hips to a slight backward lean, then draw the handle towards your lower ribs. Avoid a large lean or shrug.
- Reverse the sequence. Send your hands away, tip forward from the hips, then bend your knees once the handle clears them. Slide forward smoothly.
Coach’s cue: legs, body, arms; arms, body, legs. If the handle loops over your knees, delay the knee bend. Breathe out on the drive and in on recovery. Concept2’s rowing technique guide.
Race check: remain seated until 1,000 m and judge confirmation. Singles §8.5.
Example: 3 × 500 m at a controlled pace, with 90 seconds of recovery. Keep the stroke rate and pace reasonably stable across all three efforts.
Progression: practise a continuous 1,000 m at an effort you can sustain, then assess how you run afterwards. This is a change in the task, not a requirement to add more total rowing.
Keep settings consistent when comparing sessions. A higher damper setting is not a performance target.
Measure: pace, stroke rate, effort and the first part of the next run. Try to avoid spending extra energy for a small gain on the rower.
6 Farmers carry: build grip that lasts while you move
The carry needs you to support two kettlebells while walking and turning. Grip matters, but so do posture, stride and the ability to restart after a break.
Farmers carry technique, step by step
- Position the bells. Stand between them with the handles close to the outside of your feet. Check that the route and turning points are clear.
- Make a controlled pickup. Hinge at the hips and bend your knees enough to take a secure grip. Brace your trunk, then push through the floor and stand with both bells. Avoid twisting as you lift.
- Stand tall. Let your arms hang long beside you, with wrists in line with your forearms. Keep your ribs over your pelvis and your shoulders comfortable. Avoid shrugging or leaning back.
- Walk with control. Take short, natural steps and look along the route. Hold the bells steady instead of swinging them to gain momentum. Keep breathing as you move.
- Turn with your feet. Slow slightly before the turn and use several small steps. Avoid a sharp twist on one planted foot while the bells pull you sideways.
- Set down before you lose control. Stop, bend your hips and knees, and place both bells upright. Re-establish your grip before lifting again. Do not wait until your fingers open unexpectedly.
Coach’s cue: tall body, quiet bells, steady steps. If you lean to one side or the bells hit your legs repeatedly, reduce the load or shorten the length.
Race check: return both bells upright to the marked area. Singles §8.6.
Example: 4 × 40 m with a load that allows stable posture and secure control. Rest 60–90 seconds between carries. Shorten the distance or reduce the load if your hands start to open or the bells become difficult to control.
Progression: increase the distance of each carry before increasing the load, where grip endurance is the main need. Practise turns and controlled pickups. Build towards your division’s demand over time.
Where do handgrippers fit? A gripper lets you practise closing the hand against resistance. A carry asks you to keep supporting a load while moving. Grippers can add grip work, but loaded carries provide the more direct practice for this station.
A simple accessory option is 2 sets of 10–15 controlled squeezes per hand after the main session, with about a minute of rest. Choose a resistance that leaves a few repetitions in reserve. Static kettlebell holds are another option when walking space is limited. Select one accessory if needed, rather than adding every grip exercise.
Measure: distance before the first set-down, number and duration of breaks, and total time. A harder gripper is not the main result you are trying to achieve.
7 Sandbag lunges: build control and tolerance under load
Practise a repeatable stride, controlled knee contact and a tall finish to each repetition. Split squats and reverse lunges can help develop the strength and control needed before longer walking sets.
Sandbag lunge technique, step by step
- Secure the bag. Practise with bodyweight first, then a light sandbag. Use a controlled lift through the lap and chest to position it across your upper back and both shoulders. Avoid swinging a heavy bag onto your neck; rehearse the pickup with a coach if it is unfamiliar.
- Set your posture. Stand tall, secure the bag with your hands and brace your trunk. Allow space between your feet for balance rather than starting on a tightrope.
- Step into the lunge. Take a controlled forward step that lets the front heel stay down. Keep the front knee tracking in the same direction as your toes. The knee can move forwards; it does not need to stay behind the toes.
- Lower to clear knee contact. Bend both knees until the trailing knee touches the ground. Make contact gently rather than dropping or bouncing onto it. Reduce the load if you cannot control the descent.
- Finish tall. Push through the front foot and bring yourself upright with the hips and knees fully extended. Keep the bag stable as you rise.
- Alternate and repeat. Change the leading leg on the next lunge. Breathe and reset your posture between repetitions. Use a stride you can maintain as fatigue builds.
Coach’s cue: step, touch, stand tall. If the knee crashes down, the bag shifts or the front heel lifts, slow down and adjust the stride or load. A controlled bodyweight repetition is a useful starting point.
Race check: no extra steps between lunges; keep the bag on both shoulders during rests. Singles §8.7.
Example: 3 × 15–20 m of walking lunges, resting 90 seconds between sets. Use bodyweight first if balance or control is inconsistent, then introduce a manageable sandbag.
Progression: increase the distance while maintaining control, then work towards the relevant load. Practise standing rests with the bag supported. In training, put it down if you cannot hold it safely; record that break and reduce the next set.
Measure: stable repetitions, completed distance and how much the final section slows. When appropriate, also assess a short run afterwards.
8 Wall balls: connect the squat, throw and catch
Wall balls finish the race. Training needs to cover accurate repetitions and sensible set sizes when you are already tired.
Wall-ball technique, step by step
- Find your distance. Face the target with feet about shoulder-width apart and the ball close to your upper chest. Use a light practice throw to find a position where the ball returns within reach without forcing you to lean back.
- Start tall. Establish an upright position before the first squat. Support the ball with both hands, elbows underneath rather than flared wide, and keep your view of the target clear.
- Squat with control. Keep the ball close and lower your hips below your knees. Let your knees follow your toes and keep pressure through the whole foot. If you cannot reach the depth comfortably, reduce the load and work on the squat first.
- Drive, then throw. Push through the floor and extend your legs and hips. Use that upward drive to send the ball towards the target, finishing with both arms. Breathe out as you throw.
- Receive the ball softly. Keep your hands ready and watch the return. Bend your elbows as you catch near your chest, then continue into the next squat with control. Avoid reaching forward and folding under the ball.
- Keep the repetitions consistent. Use the same stance, depth and target aim. Take a planned break before catches or squats become unreliable. If the ball falls, regain control and restart from standing tall.
Coach’s cue: squat, drive, throw, receive. If your shoulders do all the work, use a lighter ball and reconnect the throw to the leg drive. If you keep chasing the ball, adjust your distance and aim before increasing speed.
Race check: strike your designated target. After a dropped ball, reset; do not continue directly from a bounce. Singles §8.8.
Example: 6 × 10 wall balls, resting 30–45 seconds between sets. Reduce the ball weight, set size or target height for learning if needed; build back towards the competition requirement. Count accurate repetitions and record misses.
Progression: at the same load and target, move from 6 × 10 to 4 × 15, and then 3 × 20 when you can maintain quality. Each version totals 60 repetitions. You increase the work within each set before adding more total repetitions. Later, build the total towards 100 in manageable sets.
Choose a set plan you can sustain. Opening with a huge set can be costly if it leads to long recovery breaks.
Can shoulder isometric holds and chest passes help?
They can be considered as assistance exercises when they address a clear need. An isometric hold means keeping a position still under load.
If holding the ball in position is difficult, one option is 2–3 holds of 15–25 seconds with a light ball close to the upper chest, resting 45–60 seconds. Maintain a comfortable shoulder position and normal breathing. Use a hold you can control without shrugging or leaning back.
This differs from holding a weight at arm’s length. The position should match the strength you need to practise. Shoulder fatigue can also come from poor timing, an unsuitable pace or too little help from the legs, so adding shoulder work is not always the answer.
Chest passes can practise an explosive forward throw. HYROX wall balls combine a squat with an upward throw, target accuracy and repeated catches. Keep full wall-ball practice central. These assistance drills are coaching options, not established shortcuts to a faster wall-ball station.
Measure: valid repetitions, missed targets, break time and how accurately you perform after earlier work.
Choose your training week
Choose a week you can repeat and recover from. These foundation weeks combine three runs, two strength sessions and short station practice. More days first spread the work; they do not automatically add volume.
These examples describe your total training week, including work you may do independently. Agree the number of coached sessions with Julian. They are for adults who already run and lift regularly; start below these amounts if your current training is lower.
3-day plan: combine sessions with care
Best fit: a limited weekly schedule, with enough time for longer sessions. Three days are useful only if the combined sessions remain manageable.
| Day | Training | Allow |
|---|---|---|
| Monday | Strength A, then 20–25 minutes of easy running | 65–80 min |
| Tuesday | Rest or comfortable walking | — |
| Wednesday | Quality run, then 8–10 minutes of low-fatigue station technique | 55–70 min |
| Thursday | Rest | — |
| Friday | Rest or comfortable walking | — |
| Saturday | Strength B, then 35–45 minutes of easy running | 80–105 min |
| Sunday | Rest | — |
How to progress: keep the schedule stable first. Add five easy minutes to one run when recovery allows, or progress one main lift. If the longer session becomes rushed or running form changes after lifting, split the work across the same day or reduce it. Do not turn Wednesday into a hard run, heavy leg session and station circuit together.
4-day plan: separate the main demands
Best fit: someone who wants a clear balance of strength, running and recovery, with less work combined in one session.
| Day | Training | Allow |
|---|---|---|
| Monday | Strength A, then 20–25 minutes of easy running | 65–80 min |
| Tuesday | Rest or comfortable walking | — |
| Wednesday | Quality run | 45–60 min |
| Thursday | Rest | — |
| Friday | Strength B, then 8–10 minutes of station technique | 55–70 min |
| Saturday | Rest or comfortable walking | — |
| Sunday | Easy run: 35–45 minutes, plus preparation and a short walk to finish | 45–55 min |
How to progress: use one main progression target for the block, such as running pace or sled strength. Keep the other demanding work stable. Sunday stays easy enough that Monday's strength quality is not reduced; move days or reduce work if that pairing does not suit you.
5-day plan: create room for quality
Best fit: an athlete who can train more often and benefits from shorter sessions. Begin with similar weekly work to the four-day plan, then decide whether more volume is useful.
| Day | Training | Allow |
|---|---|---|
| Monday | Strength A | 45–55 min |
| Tuesday | Easy run: 20–25 minutes, plus preparation and a short walk to finish | 30–35 min |
| Wednesday | Quality run | 45–60 min |
| Thursday | Rest | — |
| Friday | Strength B, then 8–10 minutes of station technique | 55–70 min |
| Saturday | Rest or comfortable walking | — |
| Sunday | Easy run: 35–45 minutes, plus preparation and a short walk to finish | 45–55 min |
How to progress: first use the extra day to arrive fresh for each session. Later, extend an easy run by five minutes. An experienced athlete who needs a fourth run should revise the weekly layout with the coach and first spread the existing easy minutes across four runs. Do not simply add it between Sunday and Wednesday. Tuesday must stay easy before Wednesday's quality work.
What goes inside each session?
These session examples explain the labels in all three plans. Times include warm-ups, rests and equipment changes. Choose familiar exercises that fit your movement skills and equipment. They are starting options, not a complete individual prescription.
Easy running means a pace at which you can speak in full sentences. Strength sets normally finish with 2–3 good repetitions in reserve (RIR): you could still complete another two or three with the same technique.
Strength A — squat and upper-body strength. Warm up for 8–10 minutes, including lighter practice sets. Perform a squat variation for 3 × 6, a Romanian deadlift for 2 × 8, a dumbbell press for 2 × 8 and a supported row for 2 × 8. Rest 2–3 minutes after squat sets and 90–120 seconds after the other sets. Keep 2–3 RIR. Allow 45–55 minutes in total; increase the time allowance if setup takes longer.
Strength B — hinge, single-leg control and carrying. Warm up for 8–10 minutes. Perform a familiar deadlift variation for 3 × 5, a split squat for 2 × 6 per side, an overhead press for 2 × 8 and a pulldown for 2 × 8. Add 3 × 30 m farmers carries with 60–90 seconds of rest. Rest 2–3 minutes after deadlift sets and 90–120 seconds after other strength sets. Keep 2–3 RIR; stop carries before grip or posture fails. Allow 45–60 minutes. Reduce a supporting exercise if needed to stay within the day's time and recovery budget.
Quality run — controlled repeatability. Start with 10–15 minutes of easy running and familiar movement drills. Run 4 × 800 m at a pace you can repeat without a final all-out effort, with two minutes of walking or easy jogging between repetitions. Finish with 8–10 minutes easy. Aim for about 7 out of 10 effort initially, rising no higher than about 8 near the end. Slow down or remove a repetition if pace or form deteriorates. The 45–60-minute allowance varies with running pace.
Station technique — one priority, low fatigue. Use 8–10 minutes for one skill: for example 3 × 250 m relaxed SkiErg with 60 seconds of rest, or 4 × 8 accurate wall balls with 45–60 seconds of rest. Rotate the emphasis across the block. Do not add every station example from this guide to the same week.
Race-specific replacement — practise the next run. Later in preparation, replace the quality run with 3 rounds of a 600 m run, 10 valid wall balls and a 200 m run, then two minutes of recovery. Include a 10–15-minute warm-up and 8–10-minute easy finish. Use controlled pace and a suitable ball load; record the two run splits separately. This is 2.4 km of work running and 30 wall balls, not a full race simulation. Retain separate easy running.
The ten-minute sled block described above can replace a station-practice block. In the three-day plan, Wednesday's sled work must stay easy after the quality run. Put demanding sled work on a strength day instead, replacing carries or some lower-body assistance work. Do not add it to an already full session. Across a longer programme, schedule rowing, lunges and burpee broad jumps too. Before a race-specific phase, check that all eight stations receive practice; these foundation weeks are not a complete race-preparation plan. Technique practice, demanding station work and easy running create different fatigue; record them separately.
Where two training types share a session, put the day's main priority first. Separating demanding running and heavy lower-body work can help preserve quality, but there is no single recovery interval that suits every athlete. Research on concurrent training used different sports and exercise modes; it does not validate these exact HYROX weeks. Robineau et al., 2016.
Progress towards the result you want
Choose the outcome before changing the session. More work, a heavier load and a faster time are different targets. Progress one main variable while keeping enough of the session unchanged to judge the result.
| Your main goal | Useful progression | Keep under control |
|---|---|---|
| A faster race time | Run the same distance slightly faster at comparable effort; reduce station breaks while keeping valid reps; improve the next run after a station | Compare the combined time. A faster station is not useful if it costs more time on the next run. |
| More sustainable volume | Add five easy running minutes to one session, or one modest set/distance increase in the priority station | Hold pace or load steady first. Keep recovery and the main quality session stable. There is no universal weekly percentage increase that fits everyone. |
| More strength or higher pace | Use a small load increase on a main lift, or a slightly faster pace for fixed running repetitions | Retain planned rest and technique. Do not raise load, speed and volume together by default. |
Use load, rest, tempo and sets for a clear reason
- Load: for a developing lifter, use a repeatable range such as 3 × 6–8. Once all three sets reach eight clean reps with roughly two left in reserve on two exposures, use the smallest practical load increase and return towards six reps. This is a simple option before more structured athlete blocks.
- Sets or distance: 3 × 30 m carries can become 4 × 30 m at the same load and rest. Total distance rises from 90 m to 120 m, a 33% increase, so it may be too large a step. A smaller option is 3 × 35 m, reaching 105 m. The increase must fit the athlete, not just look tidy on paper.
- Rest: reducing four wall-ball sets from 60 to 50 seconds between sets removes 30 seconds of rest across the three gaps. Keep reps, load and standards unchanged. If misses rise, restore the rest. Shorter rest trains work density; it is not always the right way to build maximum strength.
- Tempo: a squat with a three-second lowering phase, a one-second pause and a controlled rise can help practise position. Use a suitable lighter load and fewer reps. Record the tempo so sessions are comparable. Slow repetitions are a tool for control, not proof of better HYROX performance; race practice also needs its normal rhythm.
- Pace: a runner who completes all four 800 m repetitions with stable form may try a small pace change next time while retaining the two-minute recovery. If effort rises sharply, hold the pace rather than forcing the target.
For the simple progression examples above, developing athletes can complete the planned work with stable technique and acceptable recovery on two comparable exposures before progressing. This is a practical coaching rule, not a biological deadline. The established-athlete block below instead uses training history and the weekly response to decide whether a planned increase is suitable.
The four-week volume and intensity cycle
Julian often uses a four-week structure with athletes: 100% of planned volume in week one, 80% in week two, 60% in week three, then a deload in week four. Selected work becomes heavier or faster as its volume falls. The athlete's response determines whether the next increase is appropriate.
For the examples below, 100% means the planned week-one repetitions or distance for a named exercise, not maximum effort. Both 80% and 60% refer to that same baseline. Running distance, lifting repetitions and station work have separate records. Easy aerobic work does not automatically fall by the same percentages.
Example: intensify one main strength exercise
This is an alternative block for an established lifter. It replaces the main lift prescription in Strength A or B; it is not extra work to add on top. Allow more session time when the block adds sets, or remove a supporting exercise. Keep the planned rests.
| Week | Planned work | Share of week-one reps | Load and effort |
|---|---|---|---|
| 1 · Establish | 5 × 4 = 20 reps | 100% | A load that leaves about 3 good reps in reserve. Keep 2–3 minutes of rest. |
| 2 · Build | 4 × 4 = 16 reps | 80% | A small load increase if week one was controlled; keep about 2–3 RIR and the same rest. |
| 3 · Intensify | 3 × 4 = 12 reps | 60% | A further small increase only if technique and recovery allow; keep about 2 RIR. No failed reps. |
| 4 · Deload | 2 × 4 = 8 reps | 40%, illustrative | Use a lighter load and at least 4 RIR. Reduce demanding assistance work too. |
The week-four amount is one example, not a fixed rule. The aim is a clear reduction in training stress. Reducing reps while raising weight does not cut the total lifted weight by the same percentage: 100 reps at 40 kg and 80 reps at 50 kg both total 4,000 kg. Track repetitions, load and effort separately.
Example: intensify a running session
For a runner already comfortable with 4 km of interval work, one alternative is 5 × 800 m → 4 × 800 m → 3 × 800 m. That gives 4,000 m, 3,200 m and 2,400 m: exactly 100%, 80% and 60% of week-one work distance. Keep the two-minute recoveries and warm-up/cool-down structure consistent. This replaces the standard quality run in the chosen weekly plan.
An athlete currently able to repeat 800 m at 5:00/km might work towards 4:55/km, then 4:50/km as repetitions fall. Those are 4:00, 3:56 and 3:52 per 800 m. These are arithmetic examples, not target paces for every reader. Effort stays controlled; the coach can keep the same pace if the faster one is not repeatable.
In week four, replace the demanding interval session with easy running or a small amount of relaxed pace practice. Shorten other sessions if needed to reduce fatigue. Keep familiar movement; avoid a maximal test during the deload.
Match the cycle to the goal
Choose one main emphasis: change the main lift for a strength priority, the quality run for a running-pace priority, or easy-running minutes for an aerobic-volume priority. Retain the other abilities with manageable work.
This descending-volume structure can suit a block focused on heavier loads or faster work. It is not a requirement for every exercise, every runner or every week of the year. Do not intensify the main lift, running intervals and all eight stations at once.
If the main need is more aerobic volume, keep easy running as a separate progression. Build it gradually when tolerated, then reduce it when recovery requires. Repeatedly cutting all running to 60% would work against that aim. If the main need is race execution, keep station loads and standards comparable and improve pacing, breaks and transitions.
A deload supports the next training block. A taper aims to arrive ready for a race and must fit the race date. They are not interchangeable. Research and expert guidance support adjusting training stress, but they do not establish 100/80/60 or a compulsory fourth-week deload as the best HYROX formula. Deloading consensus, Bell et al., 2023. Wider resistance-training guidance also supports individual plans without requiring complex periodisation for everyone. ACSM, 2026.
Adjust the programme across 4–12 weeks
Review the athlete each week. A four-week cycle can stand alone or repeat, with changes, across an eight- or twelve-week phase. Keep useful exercises long enough to measure progress. Change the emphasis because the athlete needs something different, not because the calendar demands novelty.
One possible twelve-week route is four weeks to establish running tolerance and station technique, four weeks to develop the main strength or running limit, then four weeks to practise race-specific pacing and prepare for the event. Each phase still retains some running, strength and skill work. The race date and response determine recovery weeks and the final taper; not every phase needs the same descending-volume pattern.
Decide whether to progress, repeat or reduce
| What the training record shows | Next action |
|---|---|
| Planned reps and splits are repeatable; technique is stable; normal energy has returned before the next key session | Progress one variable by a small amount. |
| One unusually poor session, disrupted sleep or extra life stress | Repeat the target or make that session easier. Do not judge the whole block from one result. |
| Repeated slowing at the same effort, missed work, unusual soreness or falling motivation across several sessions | Reduce sets, distance or pace; review sleep, food, schedule and total stress. Bring the deload forward if appropriate. |
| Persistent pain or symptoms that change movement | Stop the provoking work and seek appropriate professional assessment. |
After a successful deload, set the next baseline from what the athlete can now repeat. That might mean the same reps with a slightly heavier load, the same interval distance at a controlled faster pace, or a little more easy running. Do not increase all three automatically.
Measure: compare one repeatable run and one short run–station session under similar conditions. Use the same route or machine, load, standards and rest where possible. Record time, splits, valid reps and effort. A test replaces a hard session; it is not an extra hard day. Better numbers at much higher effort are not a like-for-like improvement.
Measure the whole race cost
Use a simple training record: load, surface or machine setting, distance, repetitions, work time, rest time and perceived effort. When practising a station followed by a run, record both.
Suppose you save 15 seconds on a sled effort but the next run takes 25 seconds longer. The pair of efforts is ten seconds slower. This is an illustrative calculation, but it explains why a station record is only part of the picture.
Other details worth rehearsing include:
- Transitions: know the station order, equipment setup and route in and out of the Roxzone, the transition area.
- Movement standards: count valid repetitions. Record why an attempt would not count.
- Breaks: practise where you will pause and how you will restart. Compare planned short breaks with unplanned long ones.
- Race preparation: test familiar footwear, clothing, food and drink during training. Avoid introducing them for the first time on race day.
- Recovery: leave room for sleep, sufficient food and easier training. Review the whole week before adding another hard session.
Questions about personal training for HYROX
Can I start if I am new to HYROX?
Yes. Start by assessing running tolerance, strength and the movements you can perform consistently. You do not need to complete a full simulation at your first session. The event date and division should fit the preparation you can realistically complete.
How long do I need to prepare?
Your starting point matters more than a fixed number of weeks. Someone who already runs and lifts regularly has different needs from someone returning after a long break. Agree the timeline after reviewing current training, recovery and the demands of your chosen event.
Should every workout combine running and stations?
No. Separate sessions give you room to improve strength, running and technique. Combined sessions then help you practise how those parts work together. Full race simulations can be useful checkpoints, but they also need recovery time.
What changes for Doubles?
Both partners complete the runs together, while station work can be shared under the Doubles rules. Practise a shared running pace, changeovers and how you divide each station. One-to-one preparation should be supported by appropriate practice with your race partner. Official HYROX Doubles rulebook.
Do I need access to every piece of race equipment?
You can build much of the supporting strength and fitness with standard gym equipment. Direct practice remains useful for sled surfaces, rope handling, machine rhythm, sandbag position and wall-ball targets. Discuss your equipment access so the plan identifies where you will practise each skill.
Build your HYROX training plan with Julian
Tempo Performance provides one-to-one personal training for adults at 1 Cavendish Mews North, Fitzrovia, London W1W 6LA. The entrance is off Hallam Street.
Bring your race date, division, current training week and the stations you find hardest to the conversation. Julian can use these to discuss your starting point and what your preparation needs.
Request a free consultation or learn about Julian.
For more background, read whether HYROX fits your current training and how to combine strength and cardio in one week.